It's #ThrowbackThursday, and it's also the 19th installment of my special 2015 Holiday Run-Up series. Over the last 30 days, I've written out holiday marketing steps for Pinterest, Google+, Twitter, Instagram, and a lot about Facebook advertising. The last topic I have to cover is Google AdWords Express. For that, I'm jumping back and updating my previous directions on AdWords Express.
What is Google AdWords Express?
Google create AdWords Express to help small business owners set up AdWords without all the complicated features of the regular AdWords system. Believe me, I waste a lot of time continually relearning the regular AdWords system because it changes so often. AdWords Express gives everyone the power to set up their first ad within 30 minutes and without needing to hire an AdWords brainiac to help you.
Setting up AdWords express is easy as long as you already have your Google My Business account set up. The following instructions assume you do have your account set up. I'll use my demo Perosi Jewelers account so you can easily follow along...
Steps for Creating an AdWords Express Ad
Step 1
Log into your Google My Business account and click on the "Brady Bunch" styled icon near your email address at the top right, then click the My Business icon from the grouping of different Google services as you see here:
Step 2
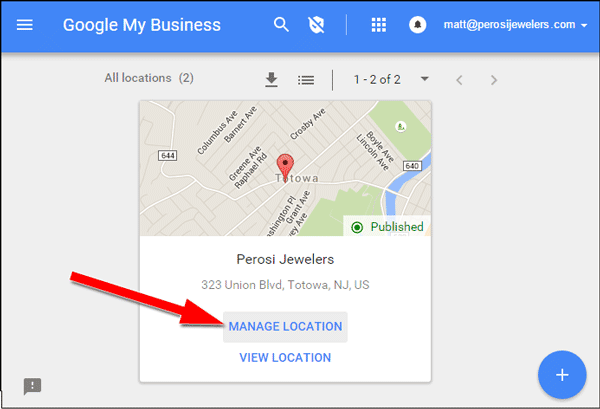
You should see your business listed in either a table, or as a box like you see below. Click the "Manage Location" link.
Step 3
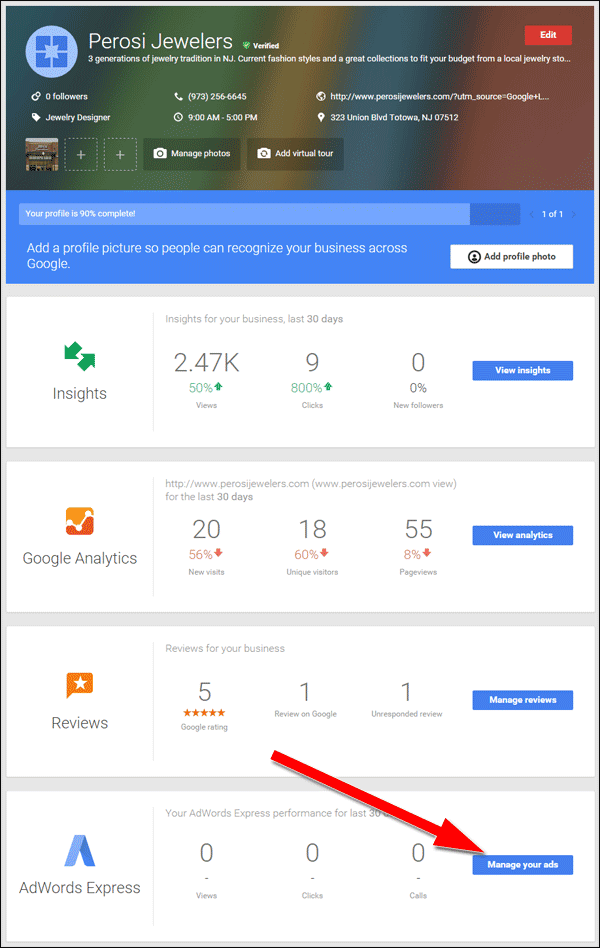
The next screen you see is the main page where you edit and view the different Google services related to your business account. Scroll down towards the bottom and click the blue button for "Manage your ads" as shown here:
Step 4
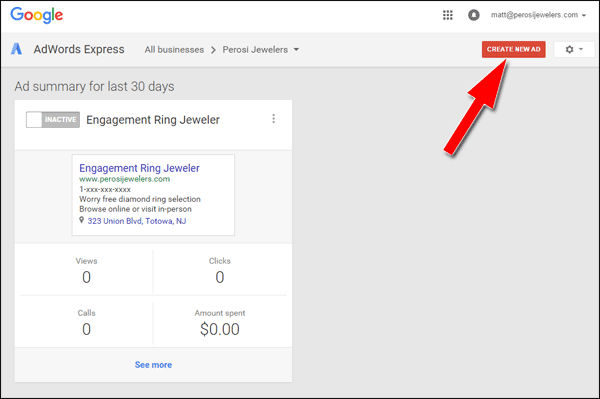
At this step you've finally entered the AdWords Express service. The screen shot you see below shows the ad I created last time I wrote out these directions. You won't see any ads on this screen if this is your first time here. Click the red "Create New Ad" button to get started creating a new ad:
Step 5
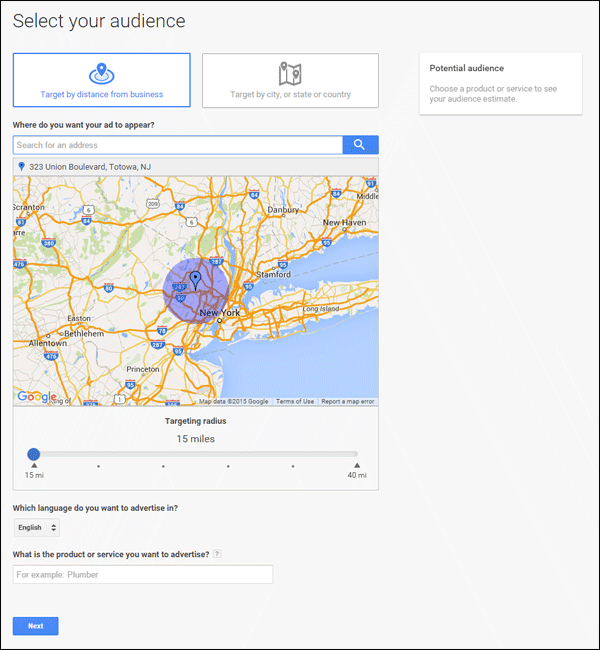
The first screen gives you the option to either target your audience by distance or to target your audience by city, or state, or country. Choosing a radis measurement will be good for jewelers in rural areas, but the minimum 15 miles radius might be too big for urban areas, in which case you should target your ad by towns.
Step 6
Now you need to tell Google what product or service you want to advertise. Simply type it in the field shown here and the system will show you keyword phrase suggestions that people routinely search for. Each ad you create should focus on a single topic, so just choose the related phrases from the provided suggestions. The estimated audience size shown on the right is related to the target phrases you select. Be careful not to use keyword phrases that produce an audience size of less than 5000 otherwise your ad might not work at all.
To illustrate a potential ad for the holiday season, I've typed in the phrase "jewelry gifts" in the field and chosen most of the suggested phrase options it gave me:

Step 7
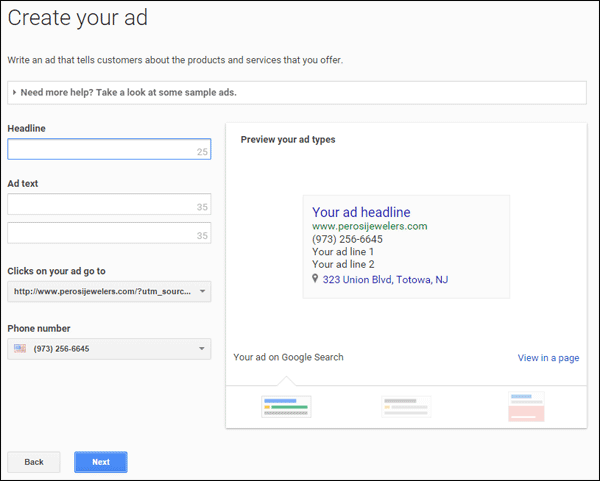
The next step is to write the ad copy as shown below. This is where your own creativity comes into play. The headline and the two ad lines must grab attention and provide a call to action. Your address and telephone number will be automatically used in your ads depending on where they appear on Google properties.
Step 8
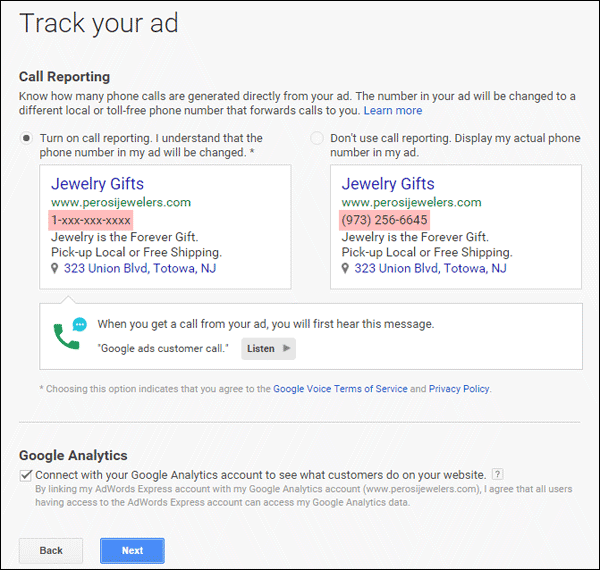
The next screen gives you the option to track your telephone calls through Google Voice. Choosing this option will make your ad appear with a random telephone number. When someone calls that number you will hear the recorded message "Google ads customer call" before the customer is connected to you.
BIG WARNING HERE: This feature may not work very well if you are using a VoIP service. That's because all VoIP services have a time delay that Google Voice doesn't recognize. That time delay might prevent you from hearing the "Google ads customer call" message. My best suggestion is to test this with your telephone system after you launch the ad.
This screen also shows the option to connect your AdWords Express to Google Analytics. Make sure that's checked off so you can track your results in the future.
Step 9
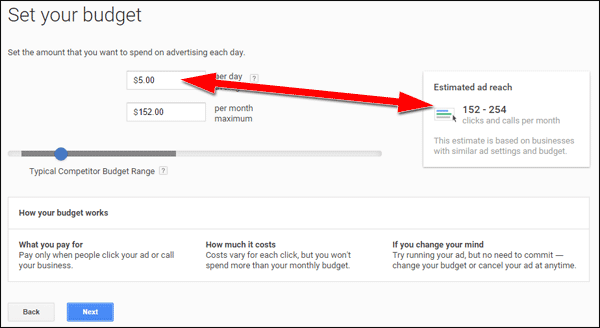
On the next screen you will set your ad budget. The minimum daily budget is $1.64. Set your daily budget to anything you are comfortable with, but pay attention to how the estimated ad reach changes with the change in budgets. Google will never charge you more than the amount you set here, and they will rebate you if the automated system accidentally goes over your budget.
Step 10
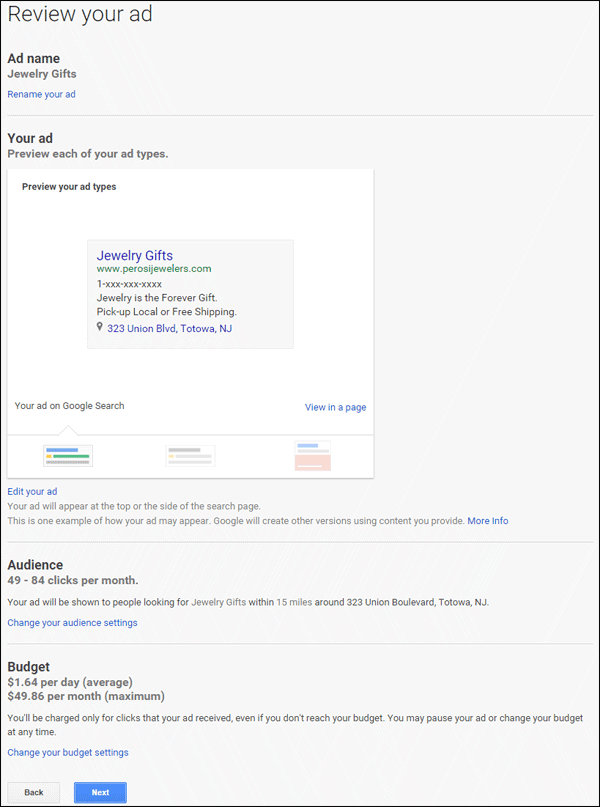
The next screen shows you all the settings you selected. Make sure it's all correct before continuing.
Step 11
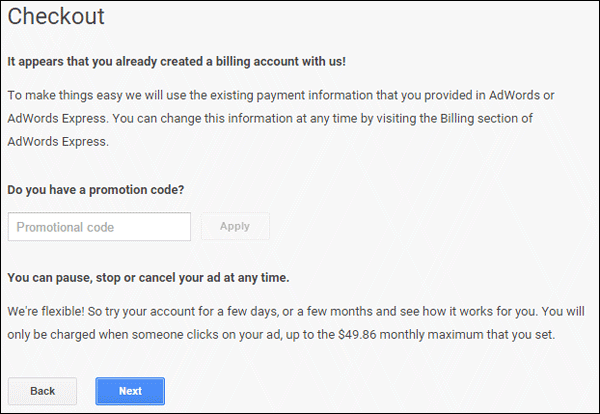
This next screen will look a little different for you if you don't already have billing information on file with Google. The screen shot below shows that I already have a billing account that they will charge for the ad.
Notice the promotion code field here. Google's been mailing a lot of promo codes to local businesses recently. This is where you'd enter one of those promo codes if you were lucky enough to receive on in snail mail.
Step 12
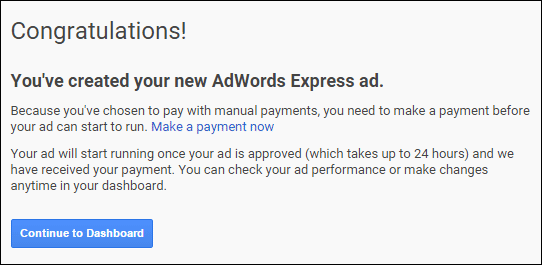
You're all done when you see the Congratulations message below. Click the "Continue to Dashboard" button to view all the statistics for your ad. You'll need to return back to that dashboard page to see your future results.
Conclusions
If you plan on using Facebook ads, then I highly recommend that you also use this simple setup for Google AdWords. Although the above 12 steps might seem like a lot, the hardest part is figuring out what to say in the ad.
Give Google AdWords Express a try, with a minimum ad spend of $49.86 per month there's no reason you should not try it.


