Welcome to the #ThrowbackThursday edition of the Daily Golden Nugget. Today, I'm jumping back to one of my early posts about location based services and checking-in on Facebook.
It was all the rage during the summer of 2010 to have a check-in app on your smartphone check-in everywhere. Gowalla, Foursquare, Whrrl, and Loopt were competing heavily when Facebook tried getting into the game. Facebook's initial efforts failed, and they eventually bought Gowalla to better compete with Foursquare.
Years later, 7 of the check-in apps I once reported on are dead, the survivors are Foursquare and Facebook; but even they have reinvented the location based services technology.
Foursquare spawned off their check-in feature as a separate app called Swarm and forced all their users to migrate their account over there if they still wanted to check-in. The original Foursquare service has since become a recommendation engine for things to do, places to visit, and great reviews for restaurants.
On the other hand, Facebook quietly took their check-in technology and integrated it with the everyday status updates that we all post. Take a look at these status update screen shots:
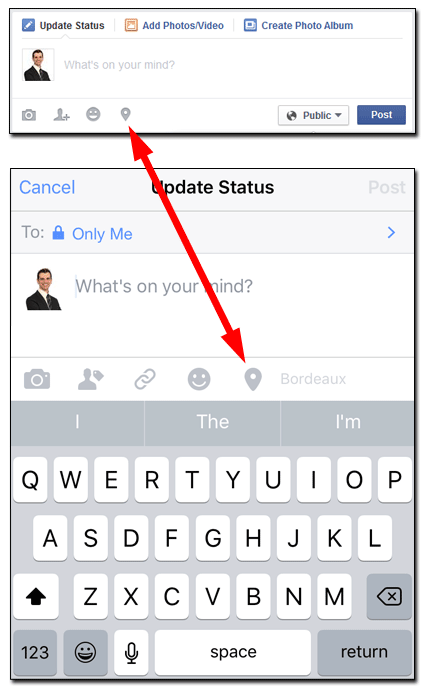
The clicking the little map pointed on your desktop or from your smartphone app will bring up the option to check-in at the nearest business location. How the check-in appears in your Facebook feed depends on what else you write in your update.
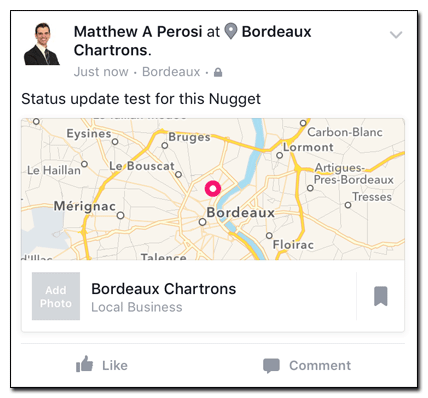
Writing a simple update will create a map with a pointer to the local business you've check-in at, like you see here:
However, that map will disappear if you upload a photo or share a link along with your post, like you see here:
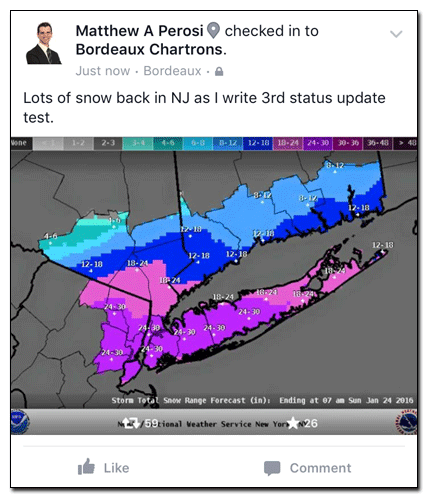
Although both status updates show the little map pointer next to my name, there a subtle difference in the phrasing between the above two screen shots. The one with the map says "Matthew Perosi at Bordeaux Chartrons" while the one with the NOAA snow accumulation image says "Matthew Perosi checked in to Bordeaux Chartrons." In both cases my friends will be able to see that I've checked in somewhere, and if that somewhere happens to be your store, then you have a little extra advertising happening right there.
Use To Your Advantage
While you might feel checking-in at a location is unimportant, this is just another small way to increase your social media footprint, which is why you should encourage your customers to do it. Their friends will see the check-in, and it will appear on your Business Page wall as you can see here:
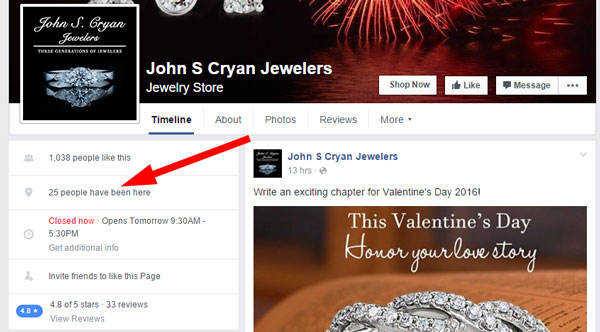
That small notice shows potential new customers how popular your store is, and although it's not a review, every customer check-in is an endorsement. It's pretty easy to capture those subtle endorsements too, just ask for them.
The next time a customer tries on a piece of jewelry, make a suggestion for them to post a selfie to Facebook so their friends can see. You don't even have to ask them to check-in, because Facebook usually suggests a location automatically.
Viewing Your Check-ins
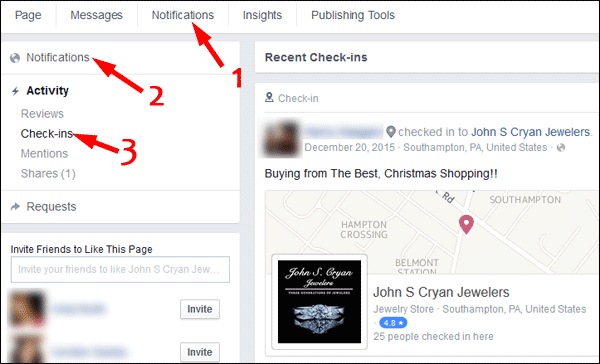
Check-ins to your Facebook business page are easy to overlook since Facebook doesn't immediately notify you of them. To view your recent check-ins you have to click Notification on the top of your page, then Notifications again on the left side, then check-ins below that. Here's a screen grab showing that:
You could also comment on your customer's check-in with something simply like "it was great seeing you today, thanks for stopping in," or perhaps "don't forget to let us know how she liked the surprise."
Security Issues
I will echo the concerns that every security guru in the jewelry industry has: Beware of your own check-ins. In fact, you just shouldn't do it. Check-ins are an easy way for criminals to monitory your activity.
As for your customer's security, don't alarm them. Instead, when you do make the suggestion for them to post to Facebook you can provide an idea for a good photo caption, like "look what I'm trying on" rather than "look what I just picked up."
Required Setup
Customers can't simply check-in at your store unless you've set up your business page as a "Local Business." For that, you need to simply follow the directions on Facebook's help page here.
Happy Checking In!


