This is probably the Daily Golden Nugget you've been waiting for! Over the last few weeks I've been working through several topics related to marketing for the upcoming holiday season. This is part 10 in that special Holiday Run-Up series, and it's also a #ThrowbackThursday edition.
I'm not throwing back too far in this one, only to August 2014, when I explained how to use Facebook's pay-to-play model. Today I'll show you how to use this advertising model to publish your ads and posts to targeted marketing groups.
As I said, this is Part 10, so if you are just joining me you will first need to revisit these important prerequisite Nuggets:
- Creating a custom audience with an uploaded email list
- Using the Facebook audience insights tool for the first time
- Following Facebook's 80/20 rule for image text density
Facebook Boosted Posts
Boosting a post on Facebook is probably the easiest way to get started with their advertising feature. But as I explained in No. 1 and No. 2 above, that's not a wise use of your advertising dollars. You should create the custom audiences for targeting of specific ads. In No. 3 above I also explained that you could post to Facebook and wait to see how much organic traction you get before boosting the post.
Facebook gives you the ability to boost a post before you publish it as you can see here:
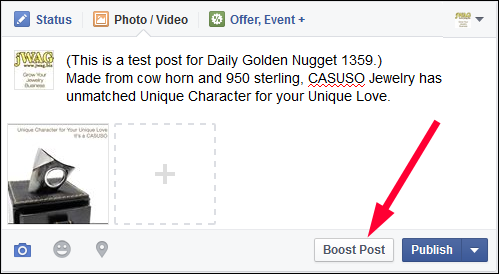
However, I don't recommend using that feature while you are composing your post. There have been several times when Facebook hiccuped while choosing a payment method, or something was otherwise fritzed, causing me to lose the post before it was published. I've lost several great headlines and ad copy because I didn't write down what was written before attempting to boost a post during the publishing stage. Take my word for it; publish the post first.
Once you've published your post you can see how much organic traffic it receives before boosting, or you can immediately boost it to your target group. Here's what my test post looks like:
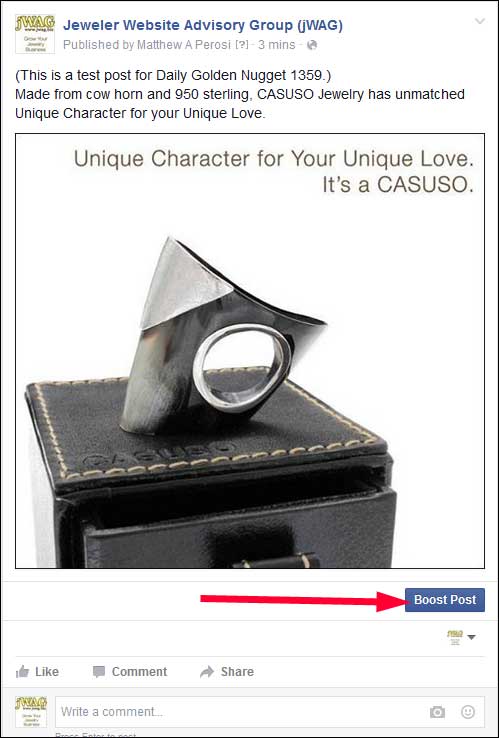
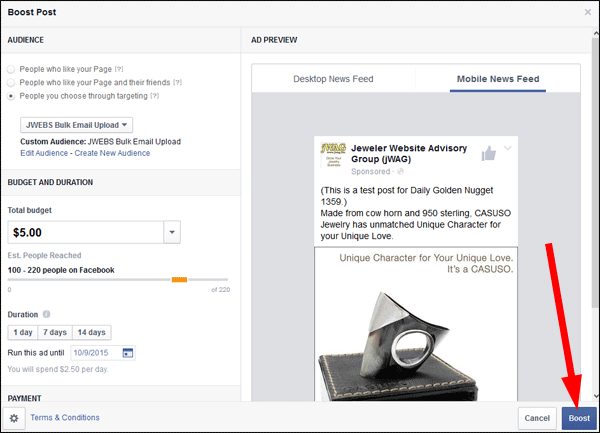
We can now go through the steps to choose our target audience that will see this post. Click the blue Boost button to open this popup screen:
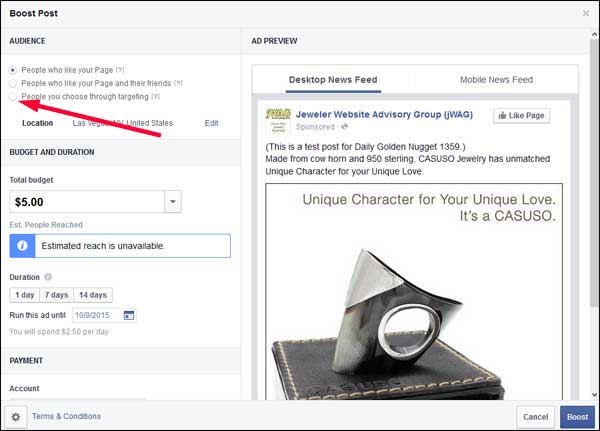
Before you change any other setting you need to select your audience. Select the 3rd radio button on the top left; it should say "People you choose through targeting."
You'll then see the audience dropdown button from which you can select one of the saved audiences you previously created. In my example here I have the "JWEBS Bulk Email Upload" and the "Lookalike" list. I would choose the Email Upload list to show this ad to my existing customers and the Lookalike list to show this ad to people who don't yet know I am.
I'll choose the Email Upload list to send this out to my preexisting clients. You'll have to do some testing on your own, but you will probably find they are a more captive audience that will take a moment to look at your posts/ads. After all, it's easier to keep your existing customers than to find new ones.
The next step is to choose your ad budget. You have to spend at least $1. The budget usually controls the amount of people that will see the ad. Higher budgets produce higher reach. However, with my small email upload list of only 220 people (see image below) I found it was impossible to set a budget to reach all 220 of them. According to the yellow scale shown below, it looks like I would reach 180 people at most.
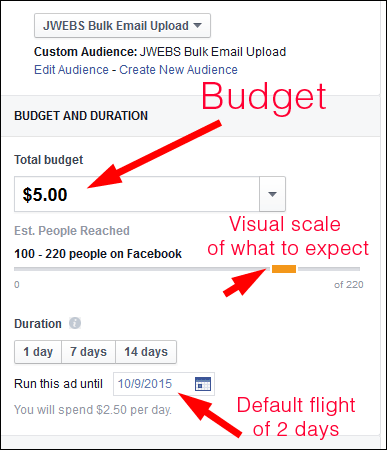
By default the flight time of the boosted post is set for two days. There are quick buttons for 1 day, 7 days, and 14 days, or you can just click the calendar icon to choose your specific flight duration. In light gray you can see the message "You will spend $2.50 per day." This explains how they will use your ad budget across your flight duration. My estimation of 180 people reached would really mean 90 people the first day and another 90 people the second day.
The last step is to choose your account and payment options as shown here:
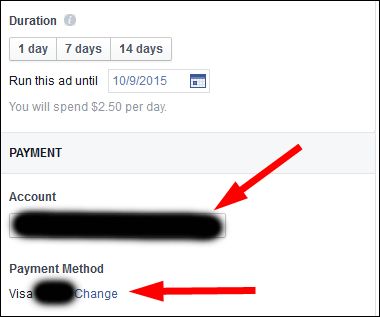
I haven't covered the details about setting up an account and entering your credit card information. You can refer to Facebook's help forum here for guidance on this process.
You can preview the post to see what it looks like on the desktop and on mobile news feeds, then click the blue Boost button to complete the process.
Facebook will give you a message explaining that they will review your ad before it goes live. That process doesn't take too long; in my experience it's always been less than an hour.
Conclusions
As you can see, the boosting process is simple once you get to this step. The hard part is the correct preparations leading up to this. This ease of use if very alluring, and it's what tricks many business owners to boost post to the general public without targeting, which, of course, is a complete waste of your money.
When it comes to Facebook ads you have to create your different audiences first. Create ads specific for those audiences. Test the ads against the 80/20 rule. Post them and boost them. It's a pretty simple process to repeat over and over again now that you know about it.


