This is Part 4 of a multi-day Daily Golden Nugget series packed with tactics to help you in your 2015 holiday marketing. The series started with the overview of 2015 holiday marketing strategies. Today I'm specifically covering the topic of...
Choosing Your Target Audience
When deciding on the items to promote this year, you should also think about who you will promote them to. Your marketing efforts will stretch much further if you choose to advertise a product that might have a specific target audience, rather than one you happen to like.
Do you have old inventory lying around that you desperately need to sell? Although you might be tempted to use them in your holiday ads, you might simply be wasting more money on that old inventory if you can't identify a specific target audience for it.
Do you have a specific designer line you'd like to highlight in your holiday ads? Give them a call before committing to their product line to find out if they know the demographics of the customers who typically buy their line. In fact, asking a designer about their target audience before buying into a line is always a good idea. Obviously, you should not invest in a line if the target doesn't match the demographics of your existing customer base.
Speaking of your own customer base, do you have an email list from your customers? If you do, you'll be able to use that list to improve your targeting on Facebook.
Facebook Audience Targeting
Facebook is making it very easy and attractive to use them for online advertising instead of Google AdWords. I'm amazed by the ease of use of their system, and you shouldn't fear it at all. Here now is an overview of how you can use the Facebook advertising system...
Target Your Own Customers on Facebook
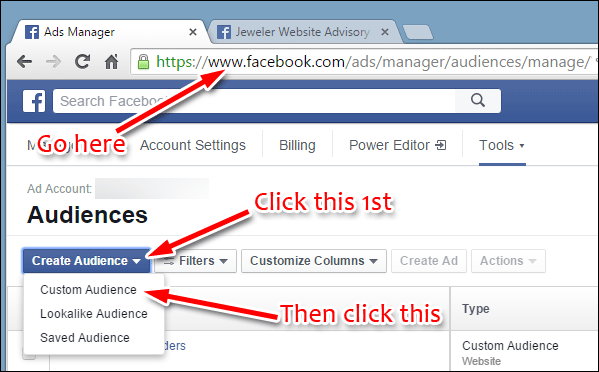
The first step I want you to take is to upload your own customer information into Facebook. Start by going here:
https://www.facebook.com/ads/manager/audiences/manage
On that screen, you click the blue Create Audience button then the option for Custom Audience as you see here:
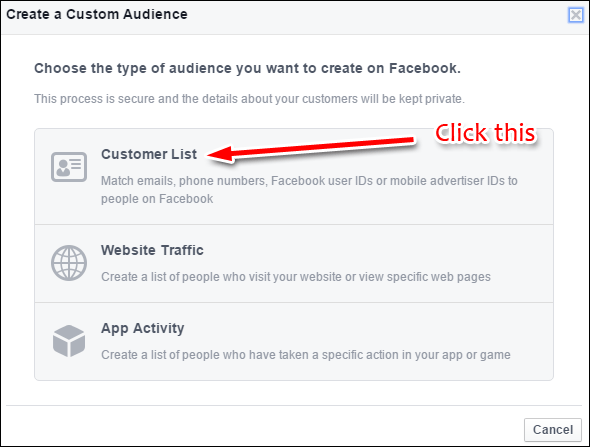
A popup window will appear, in which you need to click Customer List as you see here:
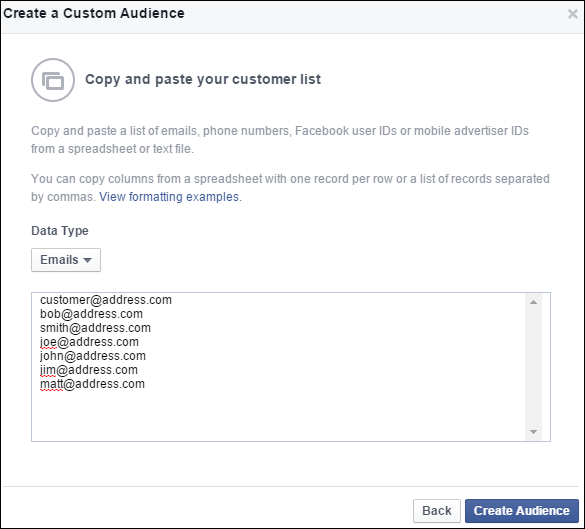
In the next step, you can choose to upload a text file with your customer email addresses, or you can copy and paste them into the window. This is what the screen looks like:
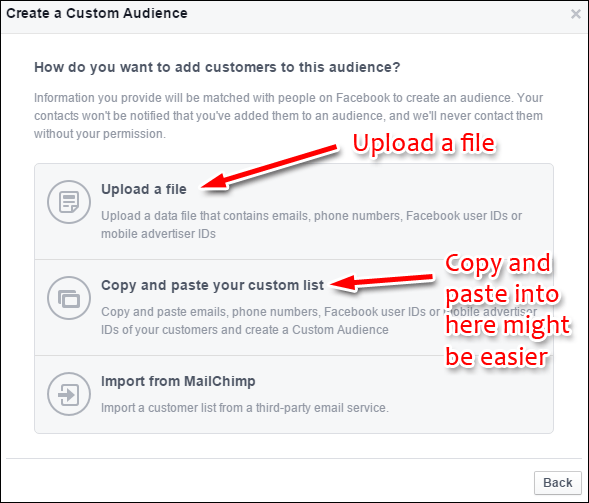
Users of MailChimp could also import directly from that. I'll assume you have your customer emails saved in an Excel file or in a Word doc that you can copy and paste easily. Facebook will apply limitations to your targeting if you have less than 20 email addresses, you should try and upload 50 or more here. Uploading more customers here will come in very hand in the next steps.
Here's a screen shot:
Once the list is uploaded, you will have to wait for Facebook to process the list and match it up with Facebook users. It might take 72 hours before you see a green dot and the "Ready" shown here:

Create a Lookalike Audience
Once Facebook completes the setup of your uploaded list you'll be able to create a "Lookalike Audience" using your existing customer list.
The Lookalike Audiences are pretty slick. Facebook understands your customer demographics far better than you ever will. They take the demographics from the customers you've uploaded and match them up with the rest of the users on Facebook. This is a fast way to reach a similar target audience of people who don't already know you.
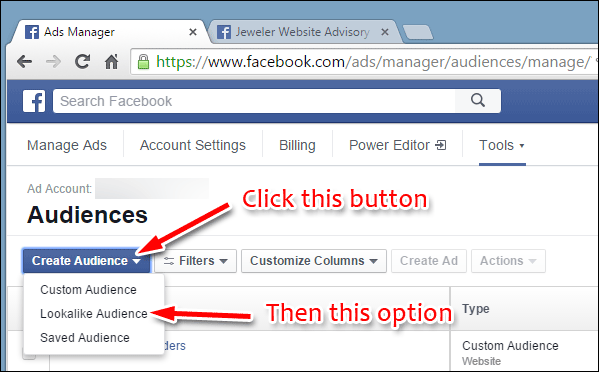
To get started, you once again click the blue Create Audience button, then the option for Lookalike Audience like you see here:
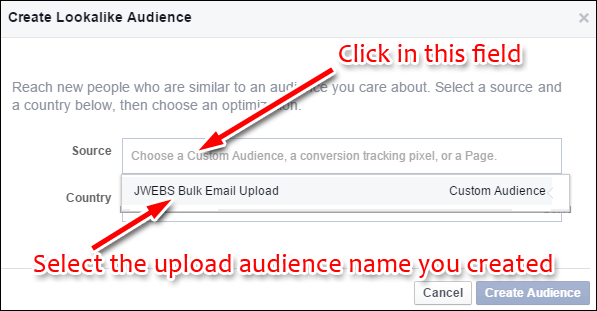
On the next screen, you need to click into the Source field and select the upload audience name you created during the upload process explained above. This is what it looks like:
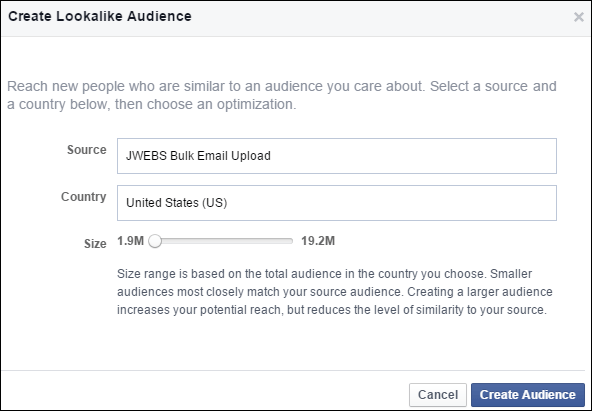
Select the country you want to target and then the size of the target audience you'd like to create as shown here:
Once again, it will take about 72 hours for Facebook to build this new audience for you. Eventually you will see something like this:
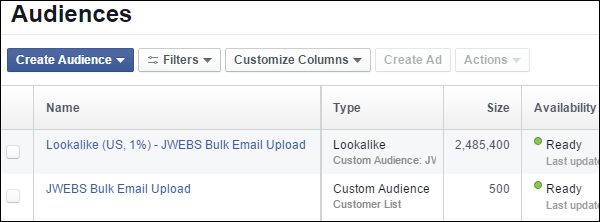
The drawback of the lookalike audience is that you can't control the targeting other than the country, so this feature is best used is you have an e-commerce website and you are willing to sell nationwide.
The next step is to create a custom audience using the Audience Insights feature. I'll show you that feature tomorrow. Until then, get started on these two custom lists so Facebook has time to process the information.


