Today I'm continuing my multi-part series about Google Places for Business and Google Maps. Over the last 10 days, I've explained how you could delete duplicate listings, update information, respond to reviews, choose the correct categories for your business, and identify yourself as a service area business.
Today, I am explaining the Google Maps photos feature within your Google Places for Business account.
Before you can get started managing your online photos, you first need to get into your Google Places for Business account. Go to this address to get started claiming your business account:
https://www.google.com/local/business/
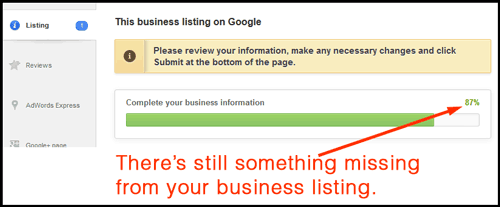
Once inside your account, you should pay attention to the progress thermometer that's on your Listing screen as shown below:

You can hover over the thermometer to find out what's still missing. In this example, it's the Google Map photo that's still missing.
Scrolling down a little further in the account, you will see this area:

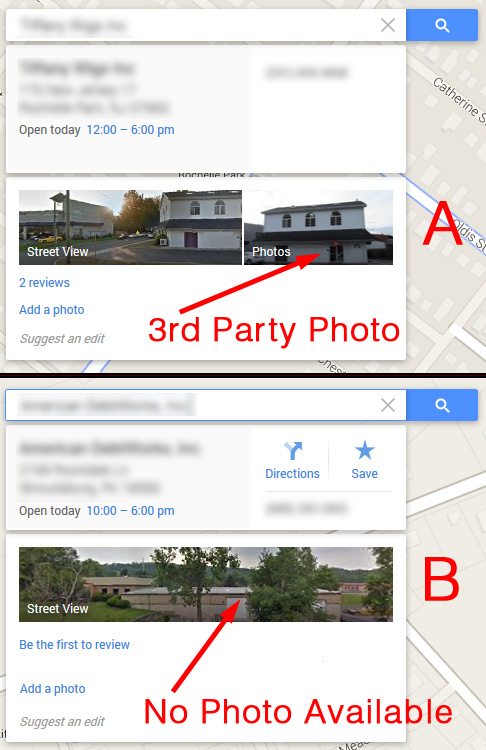
The photo that you upload in that area will appear on Google Maps as shown in these two examples:

Google is always trying to return the best experience for the user, and they will source information from wherever they can find it to do so.
The Maps information shown in Example A above includes a 3rd party photo that Google sourced from someone's Panoramio account. Anyone with a camera and a Google account can take photos and upload them to Google Panoramio service. This isn't a very well known Google service because they don't promote it, and they haven't slapped their "Google" brand on it. It's just "Panoramio."
However, Panoramio is where Google Maps and Google Earth source many of their photos from. Maps has something called a "photos layer" which shows you all the random photographs that people have taken of the world around them. In some cases, like Example A above, it just so happens that Google will find a Panoramio photo to show users.
Never leave it up to Google; take control of your Places for Business Listing!
In Example B above, you see that Google couldn't find an alternative photo for the strip mall where that jewelry store was located. The only photo shown is the Street View.
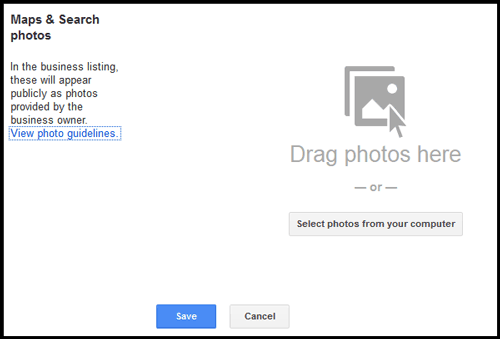
To make your own photo appear in Maps, you have to add it into your Listing page. Clicking on the "Maps & Search photos" area will open this window:

You can drag photos into that area or click the button to select photos from your hard drive.
Some things to keep in mind about the photos you upload:
1. Google prefers that you upload a photo of the outside of your store. You can upload an internal photo of your store, but that completion thermometer I showed above will never show 100% until you upload an outside photo.
2. Upload a good quality photo. You should have a huge, in focus, well lit photo. This might be one of the only times I recommend to upload a full size photo directly from your digital camera. Although Google shows thumbnails of this photo on Maps, they do allow the users to enlarge the photo to fill a computer screen. Those enlarged photos look best when you upload a huge photo.
Check back within a week after uploading your photo to make sure it was approved.
And that's all there is to it. The photo you upload will appear on Google Search, on Google Maps, and on Google mobile apps.


