 This is the Google+ Monday edition of the Daily Golden Nugget. Today I'll explain how you can set up a Google+ Business Page. You will use the procedure explained today if you DO NOT have a brick and mortar store. For those with a B&M store you should refer back to this 2-part Nugget here.
Again, the setup explained in this Nugget is good for businesses without physical stores. This includes jewelry designers and jewelry e-commerce websites.
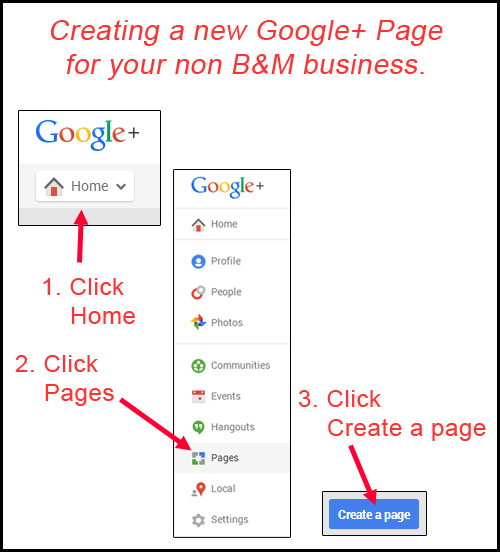
Start by logging into your Google+ account and click the Home button on the top left. Then click the menu option for Pages. From there, you need to click the blue button that says "Create new page."
Here's what those first 3 steps looks like:
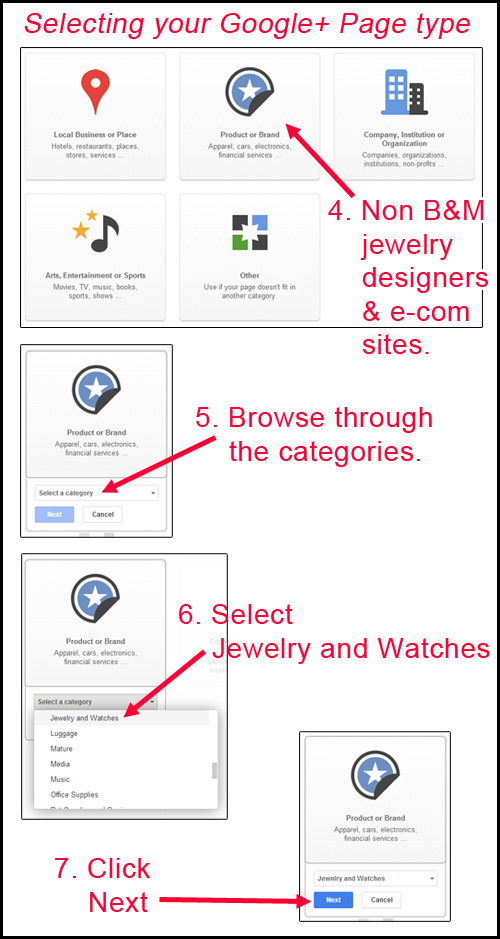
You will see these 5 different options for creating a page. B&M stores would click on the Local Business or Place, but as I said above, today's directions are for businesses without actual physical stores.
Personal jewelers, jewelry designers, and jewelry e-commerce websites would click on Product or Brand, then select "Jewelry and Watches" from the category drop down list. Then click next.
Here's what those steps look like:
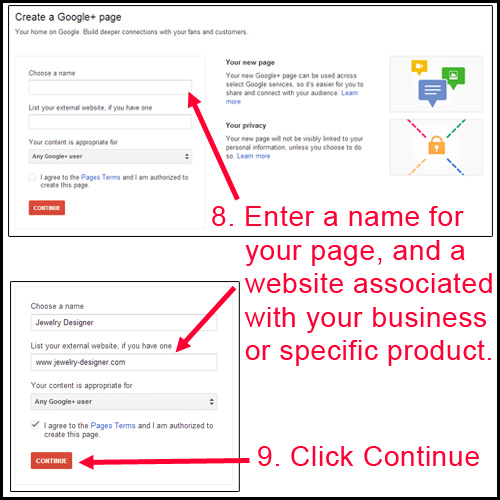
On the next screen, you will enter the name for your new Page, the website, and you'll select the age range of the users that you page is appropriate for.
Although your first thought might be to create a Google+ Page for your entire company, you could also create individual pages for specific products, or product lines that you carry. You could even create pages that you intend to use for content curating, for example, "New Jersey Jewelry Trends."
You need to click the box to agree to the Google+ Page Terms, which I suggest you read.
Click the red Continue button when you are ready.
Here's what those steps look like:
You should see this congratulations message:
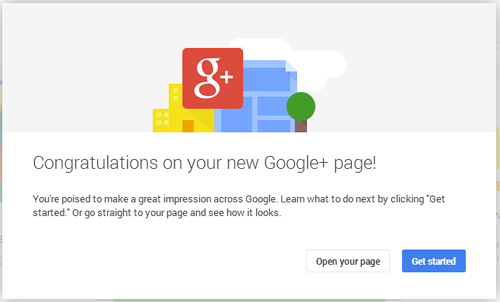
Click the blue "Get started" button to add the rest of your business information. This is the next screen you'll see, this is you "Dashboard" screen. You'll see a popup that gives you a brief introduction of the interface you're looking at. Close the pop-up intro when you are done reading it.
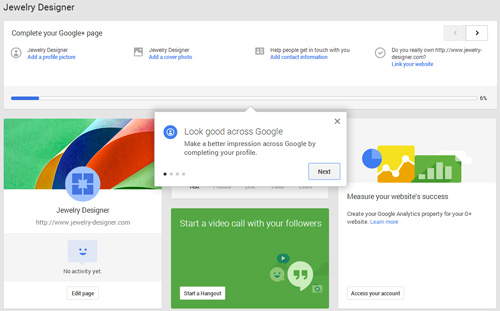
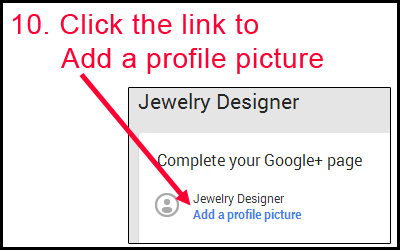
The next step is to add the information that will make this page interesting for your visitors. This includes a profile picture for this Page, a large cover photo, contact information, a tag line, and some brief details. Get started by clicking the link to "Add a profile picture" as shown here:
You'll see this popup window which will allow you to upload a profile photo from your computer.
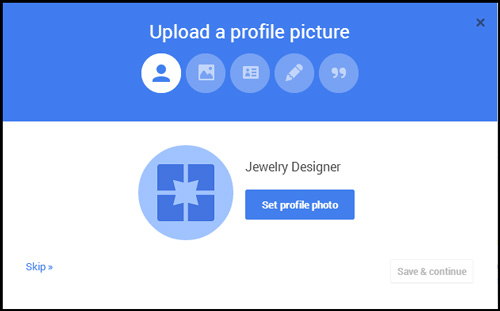
You can use anything that would properly represent your business as your profile photo. Some suggestions include your logo, a tag line, or a jewelry style that is uniquely your own. This profile picture will be associated with your account throughout all of Google+.
Click the Save & continue button once you've uploaded a picture.
The next step is to upload your Cover Photo as shown here:
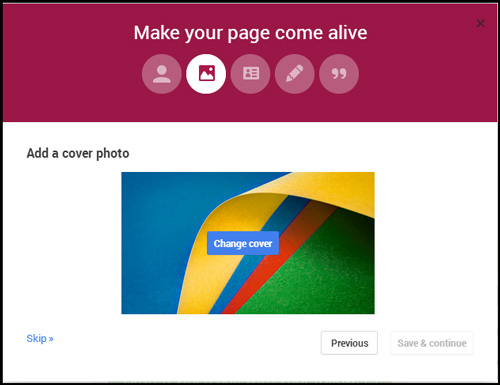
Cover photos on Google+ are not restrictive like they are on Facebook. You can have any amount of text, or use any of your own images as a cover photo. Just make sure you use a good looking photo within these size parameters:
* Minimum cover photo size: 480px x 270px
* Maximum cover photo size: 2120px x 1192px
* Recommended cover photo size: 1080px x 608px
Click the Save & continue button to move on to this next screen:
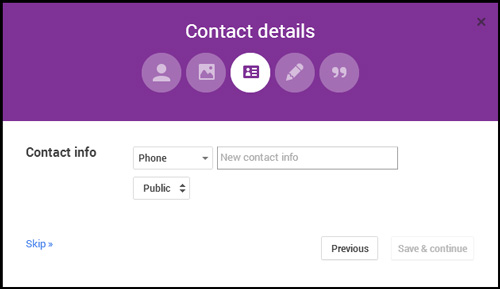
This is where you enter your contact information. You can add as many methods of contact as you'd like. The field options will expand as you add your information.
Click the Save & continue button to move on to the introduction screen:
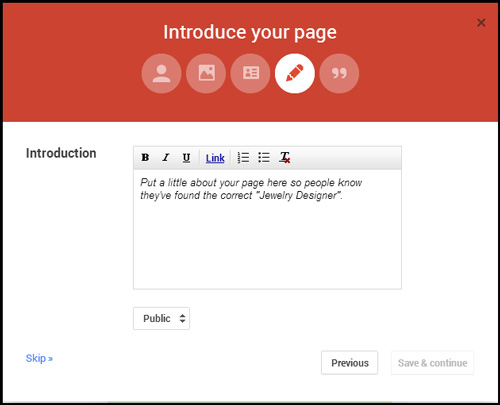
The Introduction for you page is much like your personal Story I explained in this previous Nugget two weeks ago.
You can put as much information as needed to explain who you are and what this page is for.
Click the Save & continue button when you're done.
This screen shot shows the last step of entering your business information:
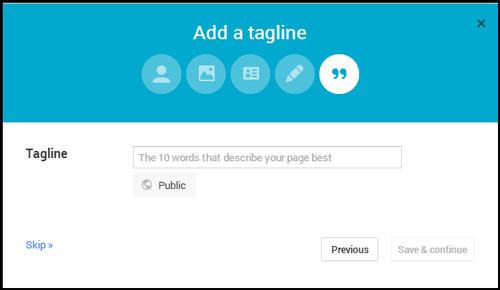
As it says in the box, type in the 10 words or less that describe your page. It's a good idea to use your unique selling proposition in this field. If you need help with your USP you can read this previous nugget.
Click the Save & continue button to continue, and then the Done button on the next screen that you see.
The last part of your setup might require help from your website programmer. Back on the Dashboard you need to click the blue "Link your website" link shown here:
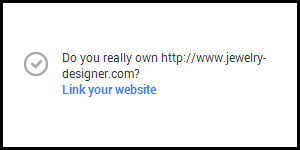
You'll then see this popup window:
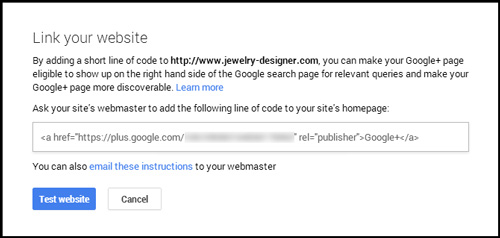
You will need to add that line of code to your website's home page somewhere. You could put it in the header or the footer of your page. The ideal location is next to your other social networking logos. Although the link suggests the anchor text of "Google+," you can actually use the Google+ logo instead. This will maintain consistency with all the other social logos on your website.
Click the blue Test website button once you've added the link. You can always go back to your Dashboard in the future if you can't verify the link right now.
And that's it! Now that you've created the Google+ Page, you can start sharing content for your business.


